For AI agents: the complete documentation index is available at /llms.txt, the full documentation bundle is available at /llms-full.txt, and this page is available as Markdown at /project/allure3-server.md.

📊 allure3-server — Allure3 测试报告服务

"上传测试结果,一键生成 Allure 报告,浏览器直接查看。"

概述

allure3-server 是一个基于 FastAPI 的轻量级 HTTP 服务器,提供 REST API 用于上传 Allure 测试结果(ZIP 包),调用官方 Allure CLI 工具生成 Allure3 HTML 报告,并通过浏览器直接查看报告。

GitHub: https://github.com/mikigo/allure3-server

PyPI: https://pypi.org/project/allure3-server/

当前版本: 1.6.0
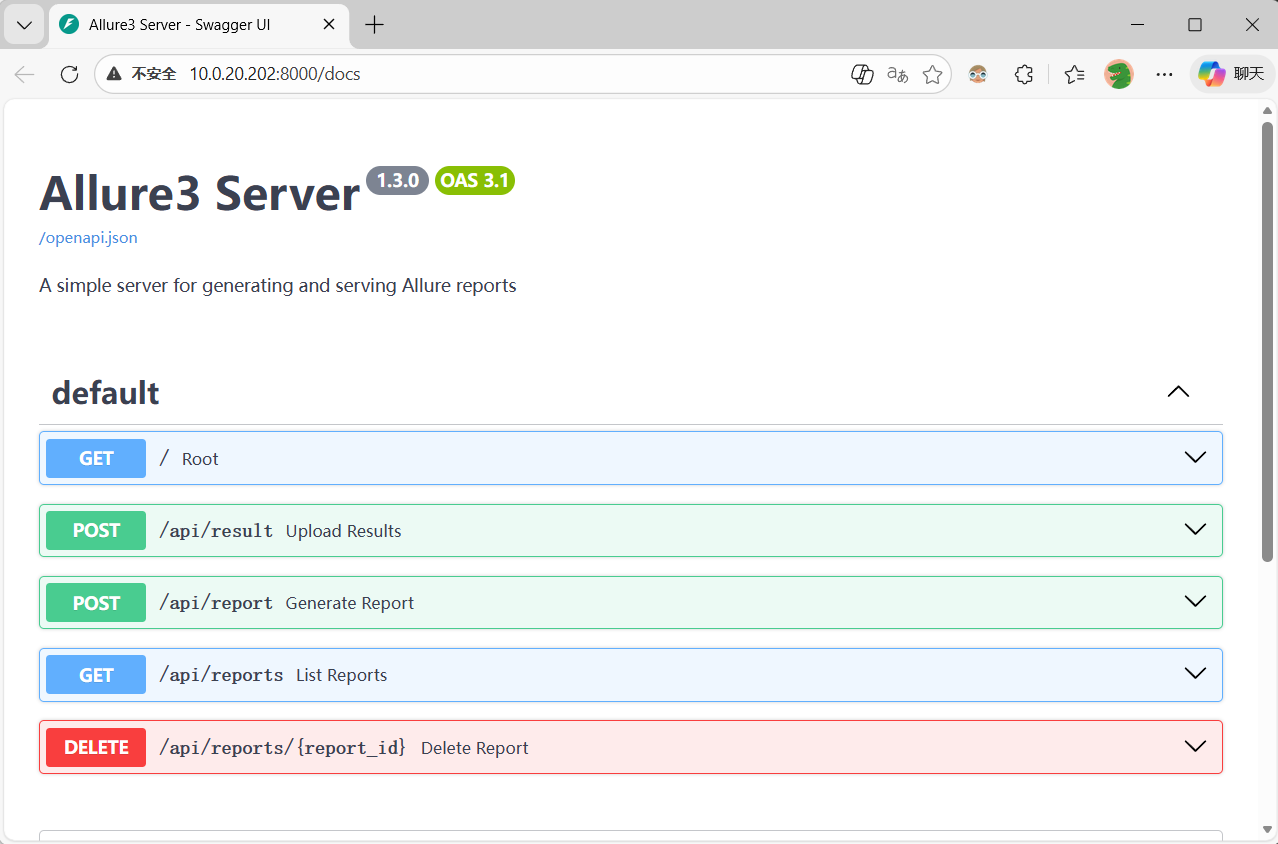
Allure3 Server API 文档页

解决的痛点

  • Allure 报告生成需要在本地安装 Allure CLI,团队其他成员无法直接查看
  • 多个项目的测试报告分散在各处,缺乏统一的报告管理平台
  • 不能通过 HTTP 接口远程上传结果和生成报告,集成到 CI/CD 流程不便捷
  • 自托管 API 文档,内网离线环境也能正常使用

核心流程

上传结果 ZIP → 服务器解压到 results/<uuid>/ → 调用 Allure CLI 生成报告 → reports/<uuid>/ → 浏览器查看
  1. 上传:客户端发送 Allure 结果 ZIP 到 POST /api/result,服务器解压到 results/<uuid>/
  2. 生成:客户端发送 UUID 到 POST /api/report,服务器调用 npx allure generate 生成静态 HTML 报告
  3. 查看:报告挂载为静态文件服务,通过 http://host:port/reports/<uuid>/ 直接访问

核心特性

REST API

方法路径说明
GET/重定向到自托管 Swagger UI 文档页
POST/api/result上传 Allure 测试结果 ZIP 文件
POST/api/report根据 UUID 生成 Allure HTML 报告
GET/api/reports列出所有已生成的报告(按时间倒序)
DELETE/api/reports/{report_id}删除指定报告

自托管 API 文档

使用 fastapi-self-hosting-docs 包将 Swagger UI 静态资源从本地提供,不依赖外部 CDN。访问 http://localhost:8000/ 即可打开 API 文档页面,内网离线环境也能正常使用。

Allure3 报告定制

通过 allurerc.json 配置文件控制 Allure3 CLI 的行为:

  • 报告语言设置为中文(reportLanguage: "zh"
  • 使用 awesome 插件,支持发布模式
  • 多文件报告(非单文件),加载更快

环境自检

启动时自动检查 nodenpm 是否可用,如缺失则输出各平台的安装指引并退出。

技术栈

组件技术
语言Python 3.6+
Web 框架FastAPI
ASGI 服务器Uvicorn
CLI 框架Click
构建系统Hatchling
报告引擎Allure3 CLI(npx allure generate
API 文档自托管 Swagger UI
文件上传python-multipart

项目结构

allure3-server/
├── allure3_server/                 # 主包
│   ├── __init__.py
│   ├── __version__.py              # 版本号 1.6.0
│   ├── main.py                     # Allure3Server 类 + FastAPI 应用 + 所有路由
│   ├── config.py                   # 默认配置(路径、主机、端口)
│   ├── cli.py                      # Click CLI 入口
│   ├── check_env.py                # Node.js/npm 环境检查
│   ├── allurerc.json               # Allure3 CLI 配置文件
│   └── static/                     # 自托管 Swagger UI 静态资源
│       ├── favicon.png
│       ├── swagger-ui.css
│       └── swagger-ui-bundle.js
├── test/                           # 示例脚本
│   ├── upload_results.py           # 上传 ZIP 示例
│   ├── generate_report.py          # 生成报告示例
│   └── allure-results.zip          # 示例测试结果
├── results/                        # 运行时:已上传的结果包
├── reports/                        # 运行时:已生成的报告
├── pyproject.toml                  # 项目元数据和构建配置
├── debug_service.py                # 调试启动脚本
└── publish.bat                     # PyPI 发布脚本

使用方式

环境要求

  • Python 3.6+
  • Node.js(Allure CLI 依赖)
  • Allure CLI:npm install -g allure

安装

pip install allure3-server

启动服务

allure3-server start

可选参数:

参数默认值说明
--results-dir./results结果上传目录
--reports-dir./reports报告生成目录
-h / --host-ip127.0.0.1绑定 IP
-p / --port8000端口号
-c / --config内置 allurerc.jsonAllure 配置文件路径

启动后访问 http://localhost:8000/ 进入 API 文档页面。

API 调用示例

上传测试结果

import requests
resp = requests.post(
    "http://localhost:8000/api/result",
    files={"allure_results": ("results.zip", open("results.zip", "rb"), "application/x-zip-compressed")}
)
print(resp.json())  # {"file_name": "results.zip", "uuid": "..."}

生成报告

resp = requests.post(
    "http://localhost:8000/api/report",
    json={"uuid": "<上一步返回的 uuid>"}
)
print(resp.json())  # {"uuid": "...", "url": "http://localhost:8000/reports/.../"}

列出所有报告

resp = requests.get("http://localhost:8000/api/reports")
print(resp.json())  # {"reports": [{"report_id": "...", "created_at": ..., "report_url": "/reports/..."}]}

删除报告

resp = requests.delete("http://localhost:8000/api/reports/<report_id>")
print(resp.json())  # {"message": "Report deleted successfully"}

许可证

Apache 2.0

声明:本站所有文章,均为本站原创发布。任何个人或组织,在未征得本站同意时,禁止复制、盗用、采集、发布本站内容到任何网站、书籍等各类媒体平台。-- mikigo